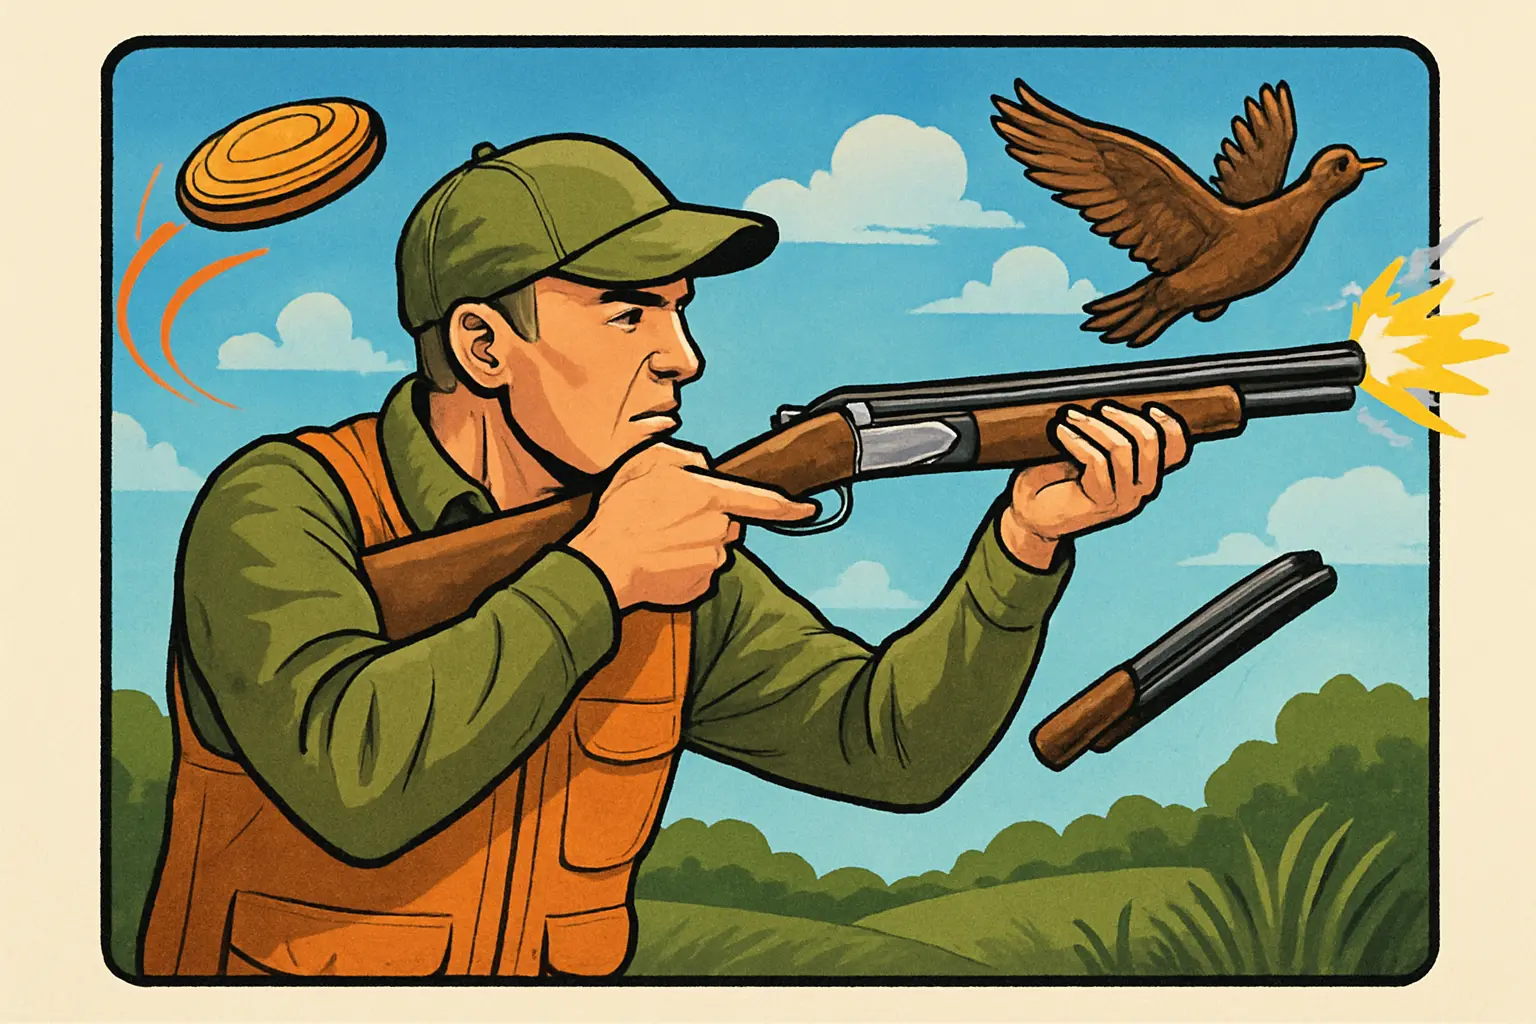
A practical, fundamentals-first guide covering stance, mount, vision, chokes, loads, clays disciplines, wingshooting and troubleshooting. Whether you’re new to shotguns or chasing cleaner rounds and ethical birds, this is the pillar to build from.
Opening
A good shotgun lesson often starts on the gravel. Not at a station, not on a stand—just on a scrap of ground where boot soles can find their line. I’ve watched a national champion draw two arcs with his heel and say, “If your feet lie, your eyes will too.” Then he had the class mount their guns without a single target in the sky. One student rolled his head off the stock. Another pinched his shoulder forward. The third crushed the mount, eyes live and quiet, muzzle moving like water. When the first target finally floated, that third shooter dusted it before the others even recognized where the bird was going.
That is the point of this guide: to stitch the quiet details together, from stance and mount to choke and load, so clays break and birds fold for the right reasons. These shotgun shooting tips span clay targets and clay pigeons, skeet and trap, sporting clays and FITASC, with wingshooting advice for dove, pheasant, grouse, quail, duck, and goose. It’s a pillar you can train from, whether you’re learning how to shoot a shotgun for the first time or pushing toward clean rounds and clean kills.
Fundamentals That Never Break: Stance, Mount, Vision, and Follow-Through
Good shotgun shooting isn’t a mystery. It’s a stack of fundamentals performed in rhythm.
Stance and footwork
- Set the rear foot and lock the line. Right-handed shooters: left foot at roughly one o’clock for crossers left-to-right, two o’clock for quartering, three o’clock for trap-like straightaways. Left-handers reverse it. This is your swing line; set it toward the break point, not the trap house.
- Athletic, not statuesque. Bend slightly at the waist, nose over toes, weight 60/40 on the lead foot. Knees relaxed, heels light. A rigid stance dies when the gun starts to move; a live stance absorbs the mount and fuels the swing.
- For clays, choose foot angles by target line. Skeet station 4? Square your hips to the center stake, plant the lead foot a touch forward, and favor the outgoing line of the second bird. For sporting clays, adjust stance for the second target of a pair if it’s the harder shot.
Shotgun mount technique
- The mount is a lift, not a scoop. Butt goes to the pocket and cheek goes to the comb at the same time, with the muzzle moving first. The gun meets your face; your face does not lunge to meet the gun.
- Keep your head on the stock. If someone could slide a credit card between your cheek and the comb at any time during the shot, you’re losing your reference and your pattern is drifting.
- Use a vertical index. Mount to the same spot on your shoulder every time. Mark your vest seam or use the crease above the pectoral as a repeatable anchor.
Eye dominance and vision control
- Do a simple eye dominance test before you build habit. Make a small triangle with thumbs and forefingers at arm’s length, focus on a distant object, close one eye. If the object stays centered with your right eye open and shifts with your left, you’re right-eye dominant. The opposite for left. Cross-dominant shooters should try both-eyes-open with a light dot patch on the off-eye or test one-eye shooting temporarily to confirm consistency.
- For cross-dominant shooters, the best long-term fix is gun fit and disciplined hold/look points that keep the muzzle between your dominant eye and the target. For high-level clays, a small occlusive patch on the off-eye above the bead can cleanly break the hand/eye conflict without killing peripheral awareness.
- Look point, hold point, break point. Your eyes lead your gun. Set your hold point where the target becomes readable—not so close to the trap that it outruns you, not so far that you run out of swing. The look point sits beyond the hold point toward the trap; the break point is where you plan to crack the target while still seeing its line.
Follow-through and swing
- Targets don’t fall from a frozen gun. Keep the barrel moving through the break. Think brushstroke, not poke. On a crosser, imagine painting a stripe through the bird after the trigger.
- Post-shot discipline. Resist head lift. Finish the stroke with your cheek still welded to the stock, muzzle smooth, and eyes quiet. This alone saves more targets than any choke trick.
Lead methods explained: maintained, swing-through, pull-away
- Maintained lead: Mount with the muzzle ahead of the target, match speed, press the trigger while holding that lead. Best for consistent crossers like skeet or steady sporting clays presentations.
- Swing-through: Start slightly behind, accelerate through the target, fire as you pass the beak, and keep swinging. Great for surprise speed or when you’re late.
- Pull-away: Start on the target, establish contact, then accelerate the muzzle away to create daylight and shoot. Wonderful for quartering birds and rising teal-like targets.
How to lead a moving target with a shotgun
Leads are a product of target speed, angle, distance, and pellet velocity. What matters to your brain is the appearance of daylight between muzzle and mark. For commonly seen shots:
- Skeet station 4 crossing: roughly a beak to a butt-and-a-beak (call it 2–4 feet with a 12 gauge target load) and a maintained lead works well.
- 30-yard dove crossing briskly: 3–5 feet with lead target loads; add a hair more with slower shells or if you float the muzzle.
- 35-yard mallard crossing with steel: 4–6 feet with a smooth maintained lead; steel patterns benefit from slightly more daylight.
- Quartering pheasant at 30 yards: muzzle parked in front of the eye-line, 1–2 feet of pull-away, gun still moving as you fire.
Your brain learns leads by repetition. Dry mounts, mirror reps, and consistent hold/look points make those pictures predictable.
Gun Fit and Setup: The Invisible Advantage
Gun fit is the lever most new and intermediate shooters never pull, and it’s the quiet competitive edge most experts won’t shut up about. If your pattern doesn’t go where your focused eye looks, nothing else matters.
Key dimensions and what they do
- Length of pull (LOP): Distance from trigger face to the center of the butt. Controls mount comfort and head position. Too long locks your shoulders and encourages head lift; too short crowds the face and increases felt recoil.
- Drop at comb and heel: Governs how high your eye sits. Too much drop leads to shooting low; too little leads to high misses.
- Cast on/cast off: Lateral bend of the stock. Cast off (for right-handers) moves the stock away from the face, putting the eye more in line.
- Pitch: Angle of the butt relative to the barrels. Bad pitch makes the gun slap the cheek or dig at the shoulder.
- Toe in/toe out: Rotation of the buttpad. Useful for shooters with fuller chests or narrow shoulders to improve contact and reduce bruising.
Self-checks you can do today
- The mirror mount test: Unload the gun, stand eight to ten feet from a mirror. Pick a spot between your eyes, close them, mount the shotgun smoothly, then open your eyes. The bead should sit directly under your master eye. Repeat ten times.
- The skeet high-house check: On station 1, hold the muzzle a foot off the house, call for the bird, and freeze the gun at trigger press. Where did the muzzle sit relative to the lid line?
- Patterning board validation: Set a 30–40′ paper or steel board at 16 yards. Mount naturally, focus on a small mark, and fire one shot with a tight choke. Your point of impact should roughly match your eye line; repeat five times.
Women, youth, and small-frame fit tips
- Shorter LOP, higher comb. Many need a slightly shorter stock paired with more comb height, not just a cut stock. An adjustable comb and buttplate save money and bruises.
- Recoil pad and pitch matter more. Soft pads and correct pitch turn a flinch-prone setup into a training tool. Reduced recoil target loads keep the mount honest during long practice sessions.
- Left-handed shooters should prioritize cast on and left-ejecting semi-autos when possible.
Cross-dominance and the real fix
- Try a small semi-opaque occlusion dot placed on the off-eye lens above the rib line.
- Slightly more cast combined with deliberate hold points that place the barrel between off-eye and target.
- If both fail, shoot with the dominant eye and matching shoulder. It’s a bigger change, but it often unlocks instant improvement.
Chokes and Loads: Choosing What Actually Works
Choke constriction and typical use
| Choke name | Approx. constriction (in.) | Typical use |
|---|---|---|
| Cylinder | 0.000 | Rabbits up close, skeet station 8, close upland over dogs |
| Skeet | 0.005 | Skeet, close sporting clays crossers |
| Improved Cylinder (IC) | 0.010 | Early trap, skeet doubles, upland over dogs, decoying ducks |
| Light Modified (LM) | 0.015 | All-around sporting clays, moderate upland, mixed decoy/pass shots |
| Modified (M) | 0.020 | Trap, mid sporting clays, pheasant, moderate pass shooting |
| Improved Modified (IM) | 0.025 | Backline trap, teal from height, late crosser clays, geese over decoys |
| Full | 0.030+ | Long trap, turkey, far pass shooting with dense patterns |
Steel vs bismuth vs lead
- Lead: Highest density among common field loads, softer on chokes, patterns forgiving. Illegal for waterfowl in many regions.
- Steel: Lower density, more pellets needed to maintain pattern energy; choose larger shot sizes to maintain lethality. Don’t over-choke; steel through tight constrictions can be inconsistent and, in some guns, unsafe.
- Bismuth: Closer to lead density, safe in most older guns, excellent compromise for waterfowl or mixed bag days. Patterns nicely with moderate chokes.
Shot size and choke combinations (typical)
- Dove: 7.5 or 8 lead; IC or LM. For high, late-season birds, try 7.5 with LM or M.
- Pheasant: 5 or 6 lead; LM or M. For wild, late-season roosters, 4 or 5 lead with M or IM.
- Ducks over decoys: 3 or 4 steel; IC or LM. With bismuth, 4 or 5 and IC/LM.
- Passing ducks: 2 or 3 steel; LM or M. With bismuth, 3 or 4 and M.
- Geese over decoys: BB or 1 steel; M or IM. With bismuth, 1 or 2 and M.
- Turkey: 4–6 lead or tungsten blends; Full to extra-full, pattern carefully.
Pattern density and pellet count
- Clays: Even, forgiving coverage; aim for no donut holes and consistent breaks. A 60/40 to 50/50 distribution works well for most disciplines.
- Upland: Roughly 120–150 hits in a 30-inch circle at the target distance with an even spread.
- Waterfowl: Fewer but harder-hitting pellets; ensure enough impacts in the vital zone (think 60–90 pellets in a 30-inch circle for ducks with steel).
How to pattern a shotgun
- Fix the distance first. Use the range or real hunting distances you expect.
- Use the exact load and choke you intend to shoot. Change one variable at a time. Fire at least three patterns per setup to check consistency.
- Count and evaluate. Evenness beats sheer density for most clays and upland scenarios. For waterfowl, confirm penetration and core density with steel or bismuth at real ranges.
Velocity vs lead
Faster loads shorten the visual lead marginally, but not enough to beat bad form. A smoother maintained lead with consistent speed control outperforms high-velocity shells that rattle your mount. Choose recoil you can manage across a full round.
12 gauge vs 20 gauge
- 12 gauge: The most versatile for clays and waterfowl; wide load options, forgiving patterns. Heavier, but recoil can be tamed with gas guns and stock fit.
- 20 gauge: Light and lively, perfect for upland, beginner-friendly with the right loads, and entirely capable on clays. For waterfowl, pair with bismuth or denser shot and keep ranges honest.
Target loads vs hunting loads
Train with target loads for mechanics. Transition to hunting loads before season to feel the timing, recoil, and pattern. Your brain files the picture differently when the gun moves harder.
Clay Shooting Tips: Skeet, Trap, Sporting Clays, and FITASC
Skeet shooting tips: station-by-station highlights
- General skeet setup: Low hold, soft eyes, maintained lead. Work from the house lids outward. Cheek weld never leaves the stock through the doubles.
- Station 1: For high house, hold just off the window; look into open sky. Break at the top of the arc. For low house, wait; don’t outrun it. Lead is modest—beak ahead.
- Station 2: Similar to station 1 but faster. Start slightly further out; smooth acceleration. Station 2 doubles: prioritize the high bird quickly and transition with the muzzle already in motion.
- Station 3: True crossers arrive earlier. Eyes soft, mount to maintained lead. Don’t poke. Let the barrel ride the bird’s line.
- Station 4: The exam. Hold close to center, short ready. Lead grows; 2–4 feet feels about right with a maintained lead. Smooth all the way through.
- Station 5: Mirror of 3. Trust your line; don’t stop the gun while transitioning to the low.
- Station 6: Faster version of 2. Commit to a crisp move for doubles; no head lift.
- Station 7: House-side birds come hard. Short hold point at the lip. See it, move, shoot, and stay in the gun.
- Station 8: Mount is everything. For high 8, start with a firm pre-mount or a very short low mount; break in front of your face. Low 8 mirrored. Cylinder or skeet choke, light target loads.
Trap shooting tips: hold points and sight picture
- Singles hold points: Start just above the house lip, slightly favoring the center. Let the bird rise into your barrel, move with it, and fire as you see a sliver of daylight.
- Don’t aim the bead. Treat trap like a series of quartering/ascending targets; keep the gun moving up the line.
- For handicap, raise your hold a touch and narrow your swing window; a 60/40 or 70/30 point of impact helps float targets over the bead without covering them.
- Common trap error: riding the target too long. Commit early to a smooth mount and break with a mild pull-away.
Sporting clays tips: reading lines, pairs, and terrain
- Look point saves pairs. For a report pair, set a hold that lets you dust the first bird early and leaves you in position for the second.
- Quartering and chandelles: The target’s true line is often a half-beat later than your eyes think. Watch a few birds, note where the wobble stops, and shoot there.
- Rabbits: Give space beneath the target. Keep the muzzle above the bounce line; aim to paint a shallow arc through the hop, not a jagged zig-zag.
- Teal: It’s not straight up; it’s a rising crosser in miniature. Pull-away with authority and a consistent finish; don’t try to outrun it at the top of the climb.
- Don’t over-choke the course. LM or light-modified-plus-skeet covers most days. Change chokes when presentation or distance truly demands it.
FITASC tips for beginners
- Pre-mount rules make the mount king. Practice a crisp, low-gun mount that lands under your eye the same way every time.
- Targets run farther and into odd windows. Make look points deliberate. On tricky pairs, your plan for the second bird must exist before you call pull.
Wingshooting Tips: Upland and Waterfowl
Dove shooting tips for beginners
- Sit with the sun at your back or to the side. Watch flight corridors like tree lines or power lines.
- Use target loads; 7.5 or 8 shot, IC choke. Mount smooth and shoot before they’re overhead; crossing leads of 3–5 feet at 30 yards are common.
- Birds corkscrew at the last heartbeat; trust your bird’s shoulder, not its wings.
Pheasant hunting shotgun tips
- Wild roosters break low and then climb. Start muzzle just in front of the head, trust a quick pull-away, and finish hard.
- Choose 5 or 6 shot with LM or M. For long flushes, step to 4 or 5 shot with M or IM and move your break point upfield.
- Walkers should avoid creeping the gun forward before flush. Keep it low, safe, and calm; mount only when the bird rises free.
Grouse and woodcock: snap shooting in the thicket
- Forget big leads. The shot is a quick, instinctive pull-through at short distance with open chokes, often Cylinder or Skeet. Loads of 7.5–9 lead for woodcock, 7.5 for grouse.
- Feet and eyes do more than the gun. Turn your front foot toward the opening where the bird will be, not where it flushed.
Quail: covey chaos, single calm
- In the covey rise, pick only one. Mount, pull through, and shoot; don’t double-clutch the trigger at a cloud. When singles scatter, plan your ambush angles, then shoot deliberate quartering lines with modest leads.
Duck hunting shotgun tips
- Decoying birds: IC or LM with 3–4 steel or 4–5 bismuth. Shoot as the feet drop and the wings cup; this is a 20–35 yard problem, not 50.
- Passing shots: LM or M, 2–3 steel or 3–4 bismuth. Push the muzzle past the beak; don’t cheat short with steel.
Goose hunting shotgun tips
- Over decoys: M or IM, BB–1 steel or 1–2 bismuth. Heads up; shoot the lead birds before they stack. Aim for the head/neck junction.
- Pass shooting: Only if you can pattern and see them well. Big daylight leads, steady swing, no head lift.
Low-light wingshooting tips
- Trust silhouettes, not colors. A simple fiber front sight helps in the gloom.
- Pre-focus your eyes where birds will appear. Bring a lens tint that brightens the background (yellow/amber in overcast, purple/rose to lift targets off green trees).
Troubleshooting: Why You Miss and How to Fix It
Shooting behind with a shotgun
Likely cause: stopping the gun or mounting late. Fix by setting a more forward hold point and committing to maintained lead or a faster pull-away. Drill on a blank wall: move a laser dot along a straight line while pressing the trigger without any hitch.
Missing over the target
Likely cause: cheek lifting or too little drop. Focus on cheek weld and finish the stroke with your head still down. If it persists after discipline, add comb height or check your drop at comb.
Missing under the target
Likely cause: too much drop or aiming down the rib. Pattern the gun, adjust comb or point of impact, and keep the gun climbing gently through the target.
Missing left/right
Likely cause: eye dominance fight or insufficient cast. Run the mirror test, patch the off-eye if necessary, and adjust cast on/off.
Flinching with a shotgun
Causes: recoil, anticipation, poor fit. Fix in layers:
- Fit a proper recoil pad and correct pitch.
- Drop to reduced recoil target loads for training.
- Dry-fire mount with snap caps to groove a break without blast.
- Try a gas-operated semi-auto to soften the push.
- If you blink, call pull earlier; surprise-kill flinches start with delayed calls.
Reading target line and speed
Track the ridge, not the rim. A chandelle’s apex and a teal’s stall tell you where the target will be forgiving. Watch for belly wobble on rabbits to time the flattest part of the hop. On waterfowl, read wind lanes. A crosswind that corrals ducks over your spread changes both speed and angle—hold points shift upwind accordingly.
Miss-diagnosis quick guide
- Behind on crossers: Increase hold point distance, choose maintained lead, and accelerate through the break.
- Over rising targets: Reduce cheek lift; choose pull-away with a softer float and keep the muzzle climbing after the shot.
- Under quartering-away birds: Start on the head, pull away 1–2 feet, finish the swing.
- Erratic on rabbits: Keep muzzle above the bounce and smooth out wrist movement; mount into the shoulder before the bird comes into view.
- Wobbling on report pairs: Over-committing to the first target. Break it earlier with a closer hold look so you arrive on time for the second.
Practice and Drills: Build Skill You Can Measure
The best shotgun shooters don’t always shoot more—they practice better.
Daily shotgun practice routine (ten to fifteen minutes)
- Dry mount drill: Ten perfect mounts to a mirror, eyes closed then open to verify alignment. Focus on cheek weld and quiet eyes.
- Blank wall swing: Pick a vertical corner and move the muzzle along an imaginary horizontal line, pressing a snap cap-trigger at three points without bobble.
- Mirror drill for posture: Watch shoulders. They should stay level; no shrugging the mount.
- Transition drill: Move from spot A to spot B with the muzzle while keeping the butt in the pocket and your cheek on the comb; press the trigger softly.
Off-season shotgun training for clays
- Build stations at home with a handheld clay thrower. Work one shot type per session and keep score on hit percentage and average target time-to-break.
- Use a laser trainer or a camera like a barrel-mounted recorder to audit hold points and follow-through.
On-range drills with metrics
- Skeet 4 standard: Shoot ten high-house crossers and track breaks when the muzzle finishes above shoulder level versus when you lift your head.
- Sporting clays “three-in-a-row” rule: Don’t leave a station until you’ve run three clean with the same plan.
- Trap ladder: Break five at 16 yards, five at 20, five at 24 with the same gun setup. Note where your sight picture fails; adjust POI if needed.
Laser and simulator guides
A good laser insert shows whether your barrel tracks in a straight plane during the trigger press. Simulators reinforce visual lead but can teach bad mounts if you cheat with pre-aiming. Treat them like a low-gun game; mount honestly every rep.
Gear and Setup Choices That Matter
Over-under vs semi-auto vs pump for clays
- Over-under: Two chokes on tap, inherently balanced, easy to regulate POI. Recoil arrives sharper but predictable. Ideal for skeet, trap, and sporting clays.
- Semi-auto: Softer recoil, great for long practice days and waterfowl blinds. Gas guns shine for smaller shooters and anyone battling flinch.
- Pump: Reliable and economical. The action stroke adds a timing layer—not a dealbreaker, but it can cost targets under pressure.
Best budget sporting clays shotgun traits
- Adjustable comb or shim kit.
- Mid-weight barrels that don’t whip.
- Crisp, clean trigger around five pounds.
- Stock dimensions that fit you today, not “the average shooter.”
Sight picture: fiber optic vs bead
- A small fiber front sight can help index in poor light, but avoid oversized day-glo posts that hijack your eyes.
- Keep the mid-bead if it helps verify mount in practice; ignore it on the shot.
Shooting glasses and ear protection
- Lens color: orange/rose to lift orange targets on green trees; purple to cut green and sharpen orange; yellow for overcast glare reduction.
- Ear pro: Amplified muffs or custom plugs save your hearing and help you hear calls and wings. Comfort is king.
Recoil reduction setups
- Gas-operated semi-auto with a soft pad and proper pitch.
- Heavier gun for clays; mass soaks recoil and steadies swing.
- Stock fit that spreads recoil evenly: correct toe-out for your chest build and no sharp pitch angles.
Tips for older shooters and reduced-recoil setups
- Light target loads, a gas gun, and a higher comb transform the experience.
- Don’t give up barrel length; longer tubes smooth the swing without adding much felt weight if the balance is right.
Left-handed and cross-dominant considerations
- Cast on stocks, left-eject actions where possible.
- For cross-dominance, occlusion patches and disciplined hold points before you swap shoulders permanently.
Choke and Load Decision Aids by Distance
- Up to 20 yards: Cylinder or Skeet, 8 or 9 shot target loads.
- 20–35 yards: IC or LM, 7.5 or 8 shot.
- 35–45 yards: LM or M, 7.5 shot.
- Over pointing dogs, early season: IC, 7.5 or 6 lead.
- Wild birds flushing long: LM or M, 6 or 5 lead.
- Decoy spreads inside 35: IC or LM, 4 steel or 5 bismuth.
- Mixed decoy/pass: LM or M, 3 steel or 4 bismuth.
- Geese over decoys: M or IM, 1 steel or 2 bismuth.
- Skeet station 4: 2–4 feet with maintained lead; keep the barrel alive.
- Dove at 30 yards crossing: 3–5 feet with lead target loads; pull-away helps timing.
- Mallard crossing at 35 yards with steel: 4–6 feet; steel favors a touch more daylight.
- Goose quartering at 30 yards: 3–4 feet, aim at the head/neck and keep the swing through the beak.
Remember, these are pictures, not numbers. Build them on the range until they stop feeling like guesses.
Clay Pigeons to Birds: Translating Skills
- Skeet teaches speed control and maintained lead. It translates to decoying ducks and passing doves.
- Trap engrains a rising sight picture and a gun that shoots a tad high; this helps on late pheasants and teal.
- Sporting clays builds reading lines in terrain and pairing strategies; that saves you when two roosters split different directions.
- FITASC hardens your mount and vision discipline—the perfect training for grouse and woodcock where low-gun, instant pictures decide everything.
Short How-To: How to Shoot a Shotgun (Checklist)
- Set your feet toward the intended break point, weight slightly forward.
- Choose your hold point (where the muzzle starts) and look point (where your eyes rest).
- Call for the target, move your eyes first, then let the muzzle follow.
- Mount the gun smoothly to your cheek and shoulder at the same time.
- Match or slightly exceed target speed using maintained lead, swing-through, or pull-away based on the line.
- Press the trigger while the barrel is still moving through the target.
- Keep your head on the stock and finish the swing after the shot.
- Evaluate: if you missed, note behind/over/under and adjust hold, lead method, or gun fit—not just the aim.
Beginner vs Advanced Focus Points
Beginners
- Build a repeatable mount.
- Verify eye dominance.
- Shoot open chokes at closer targets and pattern the gun at realistic ranges.
Advanced
- Tune gun fit and point-of-impact to your sight picture.
- Train with pressure (clean rounds on the clock).
- Film your stations to audit planning and finish.
People-Ask Style Essentials, Answered
- Do you aim a shotgun or point it?
- Point it with purpose. Your eyes focus on the target while the muzzle rides the visual line. The bead is an index.
- Should you keep both eyes open when shooting a shotgun?
- Yes, when dominance allows. Both eyes open preserves depth and peripheral awareness. If you’re cross-dominant, use a small occlusion dot or try one-eye temporarily.
- How much lead do you need for a crossing target?
- Enough daylight to match speed and angle. For clays at skeet 4, 2–4 feet feels right. For ducks at 30–35 yards with steel, 4–6 feet. Build the picture on the range.
- What is the best choke for skeet, trap, and sporting clays?
- Skeet: Skeet or IC. Trap: Modified or guns set to shoot high (60/40 or 70/30). Sporting clays: Light Modified is the all-around king.
- What shot size is best for dove, duck, and pheasant?
- Dove: 7.5 or 8 lead. Ducks: 3–4 steel or 4–5 bismuth. Pheasant: 5 or 6 lead, stepping to 4 or 5 for late, long birds.
- How far can you shoot ducks with steel or bismuth?
- Decoying ducks are a 20–35 yard proposition with steel or bismuth; beyond 40 yards the margin shrinks fast. Bismuth holds energy better than steel.
- What is a good shotgun for beginners for clays?
- One that fits. A reliable 12 or 20 gauge with an adjustable comb/shim kit, moderate barrel length, and a trigger you can control.
- How often should I pattern my shotgun?
- At the start of the season, after any choke/load change, and any time your sight picture feels different.
Pre-Shot Routine for Clays That Works
- Decide hold, look, and break points before you mount.
- Visualize the target breaking at the spot you chose.
- Breathe in, breathe out, soften your eyes, and call pull.
- Move eyes, then gun; mount only when your picture demands it.
- Commit to the plan through the shot; change only between targets, never during the move.
Station Cards You Can Carry (Mental, Not Paper)
- Hold 1/3 off center, eyes midway to the house.
- Maintained lead, muzzle alive, break on a calm window.
- Finish the stroke after the puff.
Trap singles
- Hold a rib above the house lip; see the bird, move with it, and float it into the break with a slight pull-away.
Sporting clays chandelle
- Look at the belly, not the rim. Break after apex, smooth maintained lead.
Rabbits
- Muzzle above the bounce line, no wrist flicks, brushstroke through the beak.
Local and Next-Level: Coaches, Fitters, and Ranges
- Shotgun lessons near me: A good coach gives you a vocabulary for your own misses. Search clubs and associations like NSCA, NSSA, CPSA, or local clay shooting range directories.
- Skeet coach near me: Book a session focused on stations 1, 2, 6, and 7—and station 4.
- Shotgun fitter near me: Bring your gun, your typical shells, and your goals. Confirm measurements on a patterning board afterward.
- Sporting clays lessons in your city: Coaches who talk hold/look/break point language and film your stations repay themselves fast.
Safety and Field Sense Never Go Out of Style
- Muzzle discipline beats every other rule; it lives or dies in your mount.
- Finger off the trigger until your cheek’s on the stock and you’ve committed to the target.
- In the field, mount after the flush, not into dogs or brush. Identify the bird; know your backdrop.
- In the blind, call the shot, pick a bird, and rise in unison. Safety off only as you mount.
A Few Stories That Teach More Than Rules
Your Next Season, Built on Purpose
If you boil these shotgun shooting tips down to their simple parts, you get this: build a mount you can trust, choose hold and look points deliberately, move the gun like a brush through the bird, and finish every stroke with your head on the stock. Fit the gun to your face and your purpose. Pattern like you mean it. Pick chokes and loads for the distances you actually shoot. Bring clay skills to the field and field wisdom back to the course. Keep notes. Miss with reasons, not guesses, and adjust one variable at a time.
Clays make you honest. Wings make you humble. The shotgun, if you let it, makes you better at both.
FAQ
- Do I need a fancy gun to shoot well on clays or birds?
- No. You need a gun that fits, a smooth mount, and a plan. Fancy guns amplify good form; they don’t create it.
- Why does my first shot feel perfect and my second feel rushed on pairs?
- You’re finishing the first shot late or choosing the wrong first target. Break the first earlier with a closer hold point or start with the higher-risk bird.
- Is there a magic choke that covers everything?
- Light Modified is as close as it gets for clays; IC/LM for decoying birds. But no choke replaces reading distance and line.
- Should I switch to a 20 gauge for upland?
- If it fits and you like the balance, yes. With the right loads and ranges, a 20 is delightful on upland and fully capable on clays. For waterfowl, pair it with bismuth and keep shots inside your pattern-tested envelope.
- How often should I pattern my shotgun?
- At the start of the season, after any choke/load change, and any time your sight picture feels different. It’s a quick truth serum that saves months of guessing.
Final Thoughts
There’s a reason the best shooters look calm. They’ve made the invisible decisions before the target appears—foot line, hold point, look point, break point. They’ve tuned a stock so the pattern goes where their eyes live. They accept that leads are pictures their brains earn on a practice field, not numbers scribbled in a margin. And they keep their heads on the stock long enough to finish the job.
Take these clay shooting tips and wingshooting tips out where gravel and grass meet. Mount with intent. Read the line. Let the barrel breathe through the bird. Choose chokes and loads because pattern paper told you the truth. The next broken clay, the next folded bird—they arrive the same way: planned, practiced, and finished clean.